Showing posts with label vinyl. Show all posts

Saturday, May 21, 2011

Scalloped Circle and Initials!!


So I'm so excited to show you all this new addition to my vinyl collection.  This idea I got through my crafty sister-in-law at the Creative Crate, I know she saw this idea somewhere on the Internet..but I sure don't remember where.  Where Stacie was/is going to put hers is way cute because she has painted stripes on the wall.  But she hasn't put it up yet, cause they might be building soon and doesn't want to waste it.
But I knew that I'd end up putting it in my little girls room too when I saw it.  
So I'm sort of spoiling my future reveal of everything that we've done in this room by showing these pictures but I just couldn't resist!!


So it's a big circle, that is a toddler sized bed though.

Original scalloped circle #1

So I totally remade another scalloped circle to have less scallops cause I thought I'd like it bettter.
and I do!!  One of these days I'll have to cut Kherrington a new one


14 point scalloped circle #2

So these measure about 35.5 inches on the outside of the scallops and comes in 3 pieces. Two pieces for the scalloped circle to make it easier to apply and also one more piece for the initial

This is the font that I like most with it for the initials, but if you have a different font you'd like to see in an example I can send you a PDF via email.

At that size the 3 pieces are a total of $55 and since we're over $40 the shipping is free.  Let me know if you would like a smaller one and I can get you a quote!!


I know you're dying to put it somewhere...Where's it going to be.
Shoot me an email at daisydotdecor@gmail.com and I'll need what colors you'd like the circle, the initial, and which initial you would like.
Here's a link to the colors I have on hand, but I'm willing to order others!!
post signature

Monday, March 21, 2011

Faith is the Power....

So I've been meaning to get this posted forever.  I made this window well over a year ago, along with several others to sell at the craft fair that I did. I only had one left over.  Man they sold like hot cakes!  But I didn't have a good picture of a finished product so I have been holding off posting them here.  SO you can see I still need a good picture of a finished product, cause the walls in the house we bought are almost the same exact color as some of my vinyl, (cream/light tan).  
I was just getting too anxious to get these posted, that I didn't wait until we'd painted a room a different color.  
I swear it's not going to be long and we'll my hubby will have 2 rooms painted.  I hate being pregnant and not being able to help with the painting. HEHE.  Okay I really do feel bad, but he's an awesome painter so shouldn't I leave it to him anyway?!


#1                                         #2


 You can see how striking this can be behind a colored background/wall!! That is if I didn't have the window reflecting on my glass.  *sigh*

If you're local to the SE Idaho area, I would sell this one for $75.00, but if you want to find your own old window or just put it on your wall the prices follow.

18in wide x23in. ht = $40+$5 s&h
*Note any orders over $40 get free shipping and handling
It comes in 2 parts/ and I need the 2 colors you'd like.  Find my current color selection here.
And which fonts do you like #1 or #2.

I can do custom sizes and they don't cost extra, if you have a space in mind that needs filling, shoot me an email and I'll get you a quote.


post signature

Wednesday, February 9, 2011

Jungle animal vinyl

So I had a friend that saw some little animals that she wanted to put in her little boys room.  So I played around with the images that she got me and tried to fix some lines that came out weird and these are what I came up with.


And here is what her end results were.  She ended up changing her color scheme from her original plan, and they still worked for her.  I can't believe how much cuter these are finished!!  Thanks Stacey for the picture and the fun project to work on.
What do you guys think!!?


If you'd like different sizes let me know.  Maybe if you have pictures of something you need made up in vinyl.  I love to give it a go and see if we can get you what you picture in your home. 

daisydotdecor@gmail.com


Tuesday, February 1, 2011

Valentine's Subway art!

I know, I know, Subway art is by any means a new thing, but it's so popular right now and I do love the way it looks.  So I had to see what I could come up with on my own.
And I couldn't just do it one color.  I mean that would be too easy right.  So I went with 4 colors and pieced the other colors around the black ones. 

 Here's an up close view of it.  I totally meant to keep the back of the frame out, but after I was finished applying my vinyl to the glass, I realized that I didn't pay attention to how the frame kept it's glass in. Unfortunately the swivel hooks are on the backing with the stand and then swivel into groves built into the frame.  I might have to brake out my own little tab gun and make it work for me.  That way I can back in scrapbook paper, or even keep the paint color showing through!! You'll find that I love to put vinyl on glass, windows, and mirrors.  
10x16= multicolor to piece together=$20+ $5 s&h
10x16= one color=$15+ $5 s&h
8x10= multicolor to piece together $15+ $2.50 s&h
8x10= one color= $10+ $2.50 s&h

You can pick what colors you'd like.  Go here to see current available colors.
and email at daisydotdecor@gmail.com to make and order and I'll send you a pay pal invoice!!


Now some of you may have noticed the other little item that I had in my picture.  My argyle Hugs&Kisses.  I actually made this about 2 years ago I think.  Yeah really sad cause it hasn't quite been finished, yet!!  I swear I'm going to do it.

You can see in the picture below that it's slightly poking out of the frame.  Well that frame already has a different saying on it, that I use in my kitchen decor most the year round, so I improvised and just set it inside for the picture

What do you think about the pink and purple version.  Again another one I need to frame.


Anyone out there wondering how I made these?  I could probably put together a tutorial..... and I did make these before I had a vinyl cutter, but now days with cricuts and silouettes, this would be cake!!  

Now I'm out to go to the dollar store to find a nice glass container and bright colored candies to sit on a shelf and help me soak in the Valentine's VIBE!! 

I'm linked up to the following:


Wednesday, January 5, 2011

Laundry list/Chore list

So again my friend Lori had an awesome idea that I got to work through for her in vinyl.  She gets (was asked nicely I'm sure) to teach some ladies at church some of her tricks to staying organized and this is what she came up with.  Here are 4 examples that I made for her to pick her favorite.  But I thought I give you all the same option....  So the first one is the one she picked.
Leaf Laundry list

I wanted to get Lori's full idea of how she intended to use it, so I was asking her.  At first I was a little confused cause I wasn't familiar with the "Laundry list" idea.  So she was teaching me that it's a term used for all the things that you have to get done.  She also thought about naming it a "Get 'er Done list", which I thought was so fun, and so fitting in our house.  So if you'd prefer it to say something else.  I can change that around too.  

Scroll Laundry list

Heart Laundry list

Ornate Laundry list

Now I thought I'd like more of a place to write goals and other things I'd like to get too, since I hate chores...(expecially the bathroom, please tell me that most others hate them too, ) I thought that I'd use it more the other directions, so I split them up in rows and changed it to a landscape orientation


$6 for the 8x10+$2 s+h
  $9.00 for 11x14 +$5 s+h
 $17.50 for 16x20 +$5 s+h

Again I need what color you want it?
 black choc brown, brown, cream, or white if you'd like.
What size you'd like? or if you need a special size?
And then I can send you a paypal invoice for the total.

I'm really excited to make one of these for myself cause I need more organization in my life!!

Tuesday, January 4, 2011

Come what may and Love it!!


So my mother-in-law wanted a full length mirror for Christmas...but we didn't want to be boring and just give her what she wants, we wanted to go beyond that.  So we typed up one of her favorite quotes to put at the top!


We took this picture by putting it in our hallway with a matching color on the other wall, but really it's a mirror.  And mirrors looks so awesome with vinyl on them!!
10x12=$7.50+$2 s+h
12x14=$9.00+ $5 s+h

Or if you need it resized I can do much bigger.  Email with any questions or orders. daisydotdecor@gmail.com

Wednesday, December 8, 2010

Dry erase Calendar


So my Sister-in-law (the awesome one behind the Creative Crate) had come up with a great frame remake.  Turning a frame into dry erase calendar.  She also decided that it would be a great Super Saturday project.  Don't you just love Super Saturdays...Right in time for Christmas gifts!!   And so inexpensive too.  BTW, I hope all of you realize how much work goes into those Super Saturdays. Anyways....

Well when she did hers originally, she drew on the back of the glass with a permanent marker and then cut out vinyl with her Cricut.
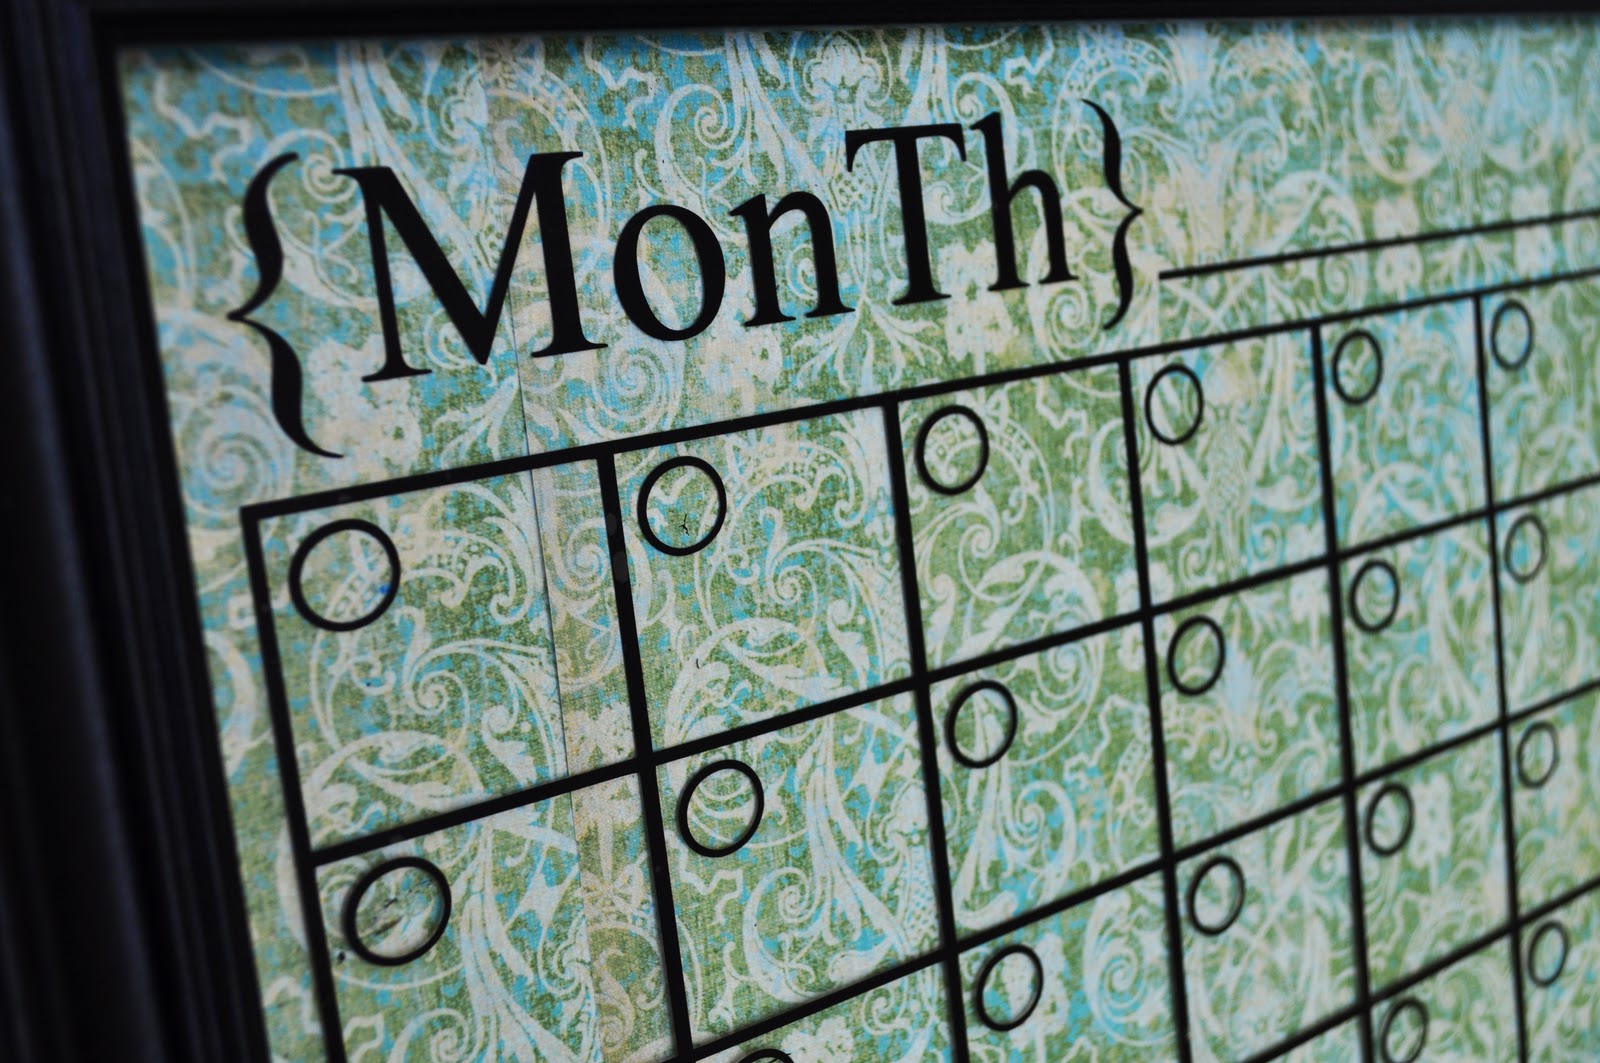
Well when she approached me to do the vinyl, I had a little easier idea for the grid too.  And see what she did with it!!  I LoVe IT!!

Here's a few up close pictures for you.
Don't you love that beautiful paper she put on the back.  You could change it for all the season to match your decor!! Or if like the idea of it just being the wall behind it, it always looks good that way too.


This is what the vinyl looks like, but it comes mirror image from this cause it's applied to the back of the glass so when you use the dry erase marker on the front side, you can wipe it off and don't have to worry about the vinyl moving!


Vinyl sizes
8x10= $6.50+$3 s+h
11x14=$9.00+$5 s+h
16x20=$17.00+$5 s+h
These sizes are based on the size of frame needed e.i the 8x10 vinyl will fit in a standard 8x10 frame on the glass.

I have black, choc. brown, brown, tan, cream, and white.  
If you'd like another color, I do have others, but these are the neutrals I have on hand.
Remember: Orders over $40.00 have free shipping. 

Anyone else think of ideas that could go along with this!!

Friday, November 19, 2010

You are a Princess..

When I heard this quote during General Conference this Fall, I kept thinking that I need to make a saying for my daughters room.  While I don't love the idea of planting the idea of being a princess to my own daughter...  (I know it's a popular theme for young girls, but I think society has defined a princess as someone who feels like they deserve things without working for them, and that isn't something I want to reinforce in my own household)
I do LOVE President Uchtdorf's idea of a princess though.  Something I think all of us girls need reminded of more often.

This can come in any size you need. It's a 2 part application, the first being the crown in color of choice (but I'd go light so you can really see the quote) and the second part with the quote.

Overall quote size  8.5 x 22.5 = 2 parts= $17+s&h

To order I need to know: 
         The color of the crown, 
         the color of the saying, and 
          the size you want it to fit in/ or how big you want it. 

I can always send you a pdf form with the area of the wall and then place the saying the size you want to you can visualize what size you'd like.  Send me an email or comment on the blog and I'll get back to you asap.

Monday, November 8, 2010

Weathered clocks


So I had a nephew that got married this summer and I told him and his wife that I'd make them a clock.  So once they picked the colors they wanted the clock, I got with Andrea and had her help me pick out the fonts that she'd like to go on the clock.  I originally had a more fancy font, but Andrea liked it a little more simple.  So we found something that worked well with her personality!!

I think it turned out pretty well, and it makes me want to cut new vinyl for my first clock I made.   This clock is 24 inches round and the vinyl would be $28.00.  But I do have a few clocks already painted that I would sell for $65.00 + $10 shipping and handling.
1- painted as above
2- Black with a cream/light tan coloring for the weathered crackle that shows through. Would come with cream colored vinyl and clock hands.
Shoot me an email if you're interested and we can send pdf files back with examples and we can personalize these clocks to your personality!

Friday, November 5, 2010

Witch Silhouette


I know it's past Halloween, but it's one of my favorite of the year.  So I had to just quickly share my witch silhouette tin that I made (with a tutorial)! My tin is 18 inches round and the vinyl for this size would be $16.00!
Things you need:
Bottle cap tin.(OR for a cheaper alternative...I saw those tin covers for older electric ranges at the                dollar store.  They wouldn't have your cute ruffled edge or the hanger, but it would be MUCH cheaper.  I think I paid $12 dollars for the tin alone.)
Paper of desired color/pattern/texture (I used a 12x12)
Scissors or fancy circle cutter
Ruler
Craft Paint to coordinate/match paper
Paint brush or foam brush
Mod Podge any finish
Vinyl- Let me know what size you need cause I can change the size without too much difficulty
Craft ink pad
Distressing ink pad


1. Take craft paint and brush on tin around the edge. (You can see below)  I chose only to do the edge, cause I was covering mine with the paper.  Let dry well before you put on the craft pad ink that is shown below.


2. I then marked the centers on my paper and measure 6 inches out to all the sides of my 12x12 and then just free handed the rest of the circle from those guides.  Then cut out with scissors.

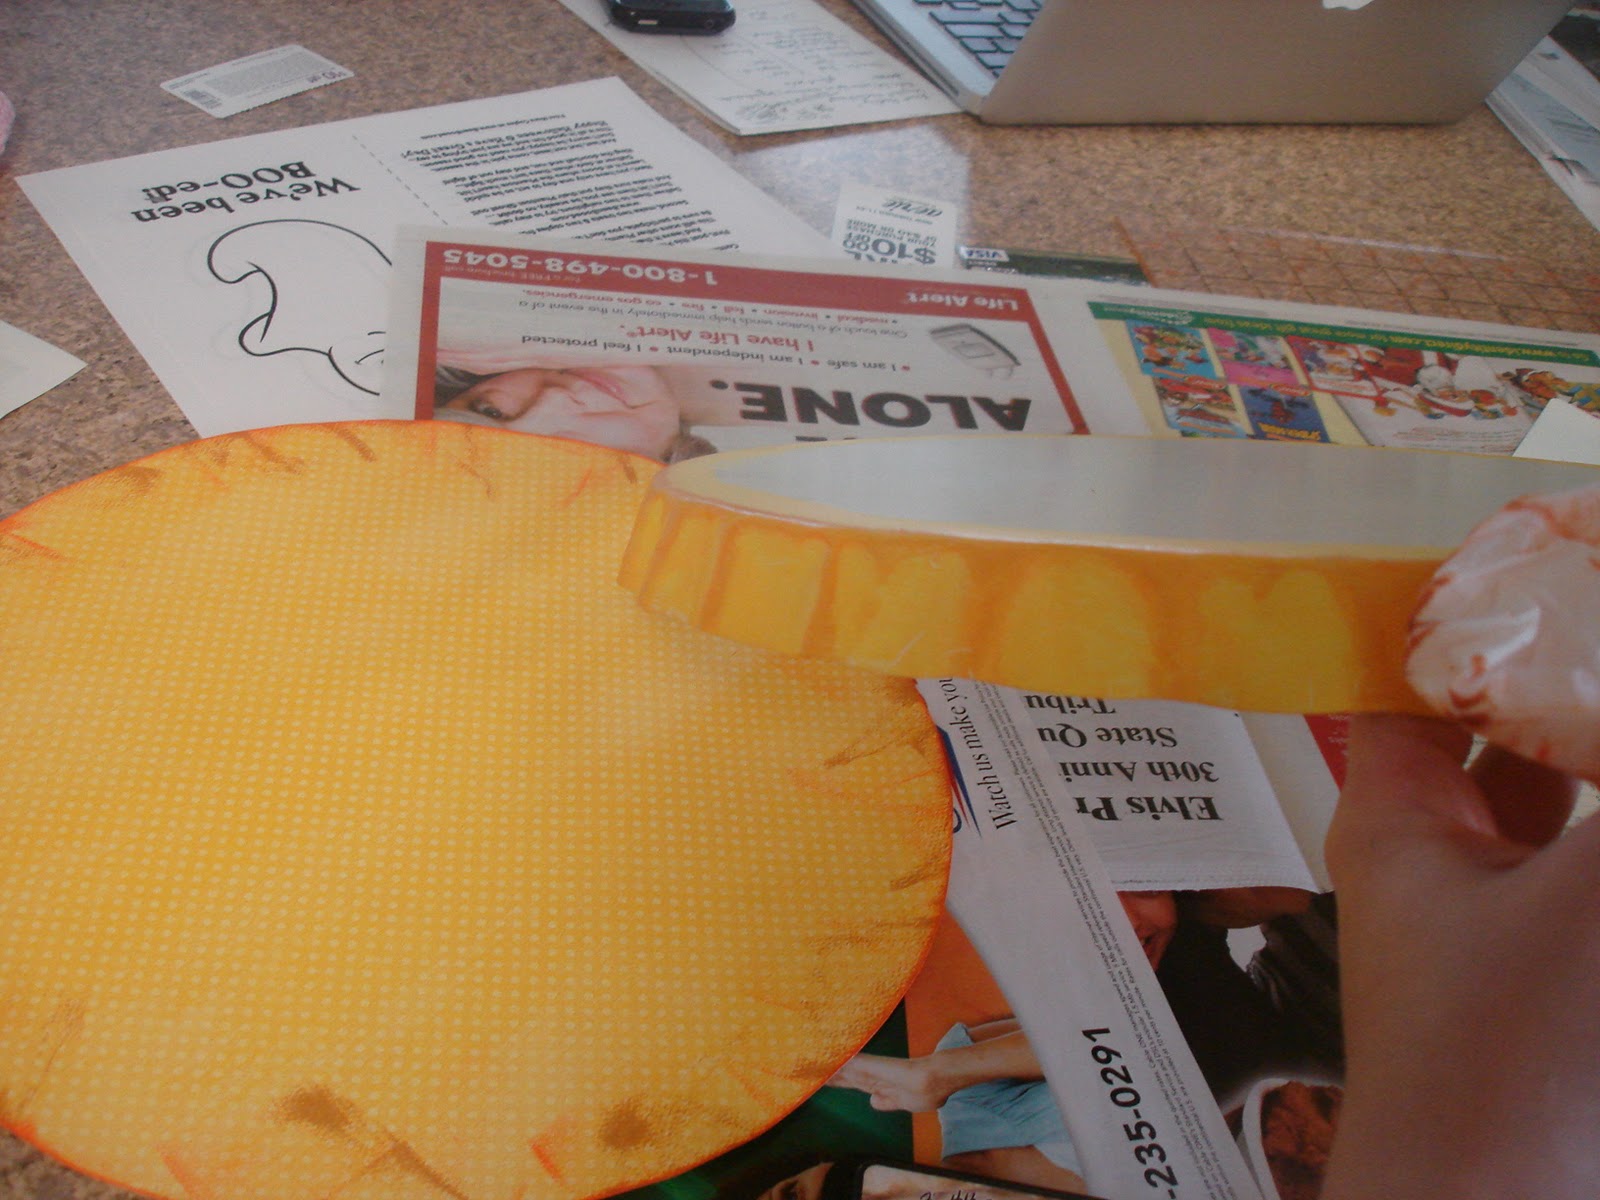
Just wanted to show my pattern and the texture of what I picked.  Yellow-Orange with lighter yellow polka dots.  Cause I love Polka dots.
If you really want exactness with your circle then you can use a fancy circle cutter, which I have one, but I preferred the more rough look, since I decided to distress the finished project.

3. So after the craft pain has dried, then I took my craft ink pad and placed it on the edge of my tin and also on my paper edge

4.  After letting the craft ink dry for a little bit, I took my distressing ink and did the same on all the same surfaces, letting the orange ink remain a little thicker than the distressing ink.  (I suggest using an old distressing pad if you have one, cause you can get some of the craft ink on your distressing pad, but mine wiped of fairly well).

5. Then I took a tissue and then buffed the area, (Smeared the area) for a more uniform look and a less blunt look on the tin.  Then it looked more aged.

6. Then I took the dried tin and the foam brush and covered the entire tin front with Mod Podge.  (Now I'm fairly new to Mod Podge and I don't have the greatest tips on its usage, but I was told if you go thinner below the paper and thicker above then it has less bumps.  But I still had some small bumps, so I'm not sure the best application... Anyone help me here?)  
7.Then I put the paper on the Mod Podge and I'm thinking that I'll use my squeegee (for applying vinyl) to make sure the Mod Podge gets totally smoothed out next time. I also hear that if you let that layer totally dry before applying the top coat it helps.  I guess you could sit and watch and make sure your paper doesn't bubble til it's dry.
 8. Then apply another coat over the top of the paper and let dry.  I used a gloss Mod Podge, cause that's what I had on hand, but I think that if I had used a matte finish that the vinyl application would have been a little easier.  Let dry completely.
9. I then marked the center of the vinyl image as above using my acrylic see through ruler.   So I could make it centered.  I then made small marks on the outside of the tin at the 12, 3, 6, 9 o'clock and lined those up with my markings on the transfer paper. The ironic thing is.  I ended up putting it on upside down :( So then I took the opportunity to cut a new one with a thicker complete circle around it. Unlike the one below.  It was hard to keep that outside in the circle shape cause it didn't stick well.

10. then take off the transfer tape carefully to make sure the vinyl stays  where you want it.  Like I said it would be easier if you use matte finish.  It was kind of a slick surface.  Then spray with a clear cover to protect the paint on the sides from chipping off it you'd like.

The other reason I cut another one is cause the vinyl circle wasn't complete around it.  I didn't love it.  But I also took this picture so you can see the texture and the fine details of the finished project.

So the finished product with some of last years Halloween projects.  Hope you enjoyed this.  It was easy enough that I might have to come up with something for Thanksgiving and Christmas to do some more!!